Ok, this was a bit tricky. I also forgot to take some pics so I had to use some old pics, but hopefully you guys will get it.
In order to remove the harmonic balancer, I had to remove this bolt:
 That bolt is on there so tight that you will need an air compressor and an air ratchet gun to get it off. My buddy Crazy Cool Carl came over with his air compressor:
 I think this was a 3 and a half horsepower air compressor that he got at Harbor Freight. We plugged it into an extension cord, let it run til it was "warmed up." It was pretty loud warming up. When the loud noise stops, that's when you know it's done warming up. We then hooked up an air ratchet gun to it. The crankshaft pulley bolt is a 15/16 bolt, so we put a 15/16 socket on the end of the air ratchet gun. Carl put the gun/socket on the bolt and pulled the trigger, and it came off in a second. AWESOME.
Then we had to get one of these harmonic balancer removal kits:
 We went to Advance Auto because they have a "tool borrow policy" where you pay for the tool, but if you bring it back the next day, they refund you 100% of the money. Great for when you only need to use a specific tool occasionally.
You'll notice in the kit that it has a few parts — some bolts, some nuts, a "crow's foot," a pushrod or two, and a clamp bracket thing. In the first pic below you can see that in one end of the crow's foot, we put in one of the pushrods (indicated by the red arrow), and in the other end, we screwed in the nut and bolt (indicated by the white arrow). We also had to stick in a pretty long bolt into the end of the crank so that the pushrod had something to push against (this is shown the second pic below. You'll notice that the harmonic balancer is already off in this pic. This is so you can see this step easier.)

 Now what we had to do is get the end of the pushrod to butt up against the bolt in the second pic above, take the three claws of the crow's foot and make them grab onto the three prongs of the harmonic balancer:
 Once they're grabbed on, attach a 3/4 inch socket and a socket wrench to the crow's foot:
 Turn it slowly but steadily. The crow's foot will start to pull the harmonic balancer off! You will know it's working when you start seeing this stripe of metal:
 Just keep turning and turning, and it will eventually come off:
 Next I will talk about removing the oil pan.
The first thing we did in removing the oil pan was removing the oil filter. Make sure the motor is upside-down, and then all you do is stab it with a screwdriver (be careful with oil spilling out of it), and using the screwdriver as a lever to turn the oil filter counterclockwise. It just screws off.
 Next, with a 10mm socket, remove all of the bolts that go all the way around the oil pan. These are circled in green in the pic below. The bolt that's circled in white in the pic below does NOT need to be removed in order to remove the oil pan, so i just left that on.
 Now just yank it off. You might have to squeeze a gasket scraper in between the oil pan and the block to help pry it off. There also might be an oil pan gasket in between the oil pan and the block. Once you get the oil pan and gasket off, you will be able to see the oil deflector and the oil pump screen:
 I removed the oil pump screen first. Just use a 10mm socket on the bolts circled in white in the pic above, and it will come right off. Then just use the 10mm socket on the bolts going all the way around the oil deflector, circled in green in the pic above. Once you get the oil deflector off, you'll now be able to get a good look at the crankshaft and piston connecting rods:
 We'll now be able to pull the pistons out soon. But first, we're going to remove the camshaft, which is what I'll be talking about next.
Before you remove the camshaft, you'll want to take out the lifter valley pans:
 I didn't use any tools to take the lifter valley pans out; I just used my hands. After you take the lifter valley pans out, you'll be able to see the lifters (one shown in the pic below):
 I just used my hands to pull these lifters too, even though they were really slippery. If they're hard to get out, you might be able to get them out with a lifter pick removal tool, or a dentist's pick that's in an L-shape. I hear those work pretty well for this. When you take the lifters out, you can just put them in the organizer tray you used to take out the rockers and the pushrods:
 Now go to the front of the engine and remove these three bolts with a 10mm socket:
 Now you can pull off the timing gear and the timing chain. Then you'll be able to see four bolts holding in the camshaft thrust plate. Take out these four bolts with your 10mm socket:
 Put the plate aside. Now what you're going to do is take the timing gear you just pulled off and bolt it back on to the end of the camshaft, with three of the 10mm bolts you just removed going into these three holes:
 Now, using the timing gear as a base, AS STRAIGHT AS YOU POSSIBLY CAN, pull the camshaft out very carefully, and try not to bang it around as you pull it out:
 Here's what it will look like when you pull it out:
 Pat yourself on the back if you've never pulled out a camshaft before. It's truly a defining moment for a gearhead. :)
Now that the cam's out, we can get started on removing the pistons and the crankshaft, which I'll talk about next.
Turn your engine upside-down. We finally get to remove the pistons and crankshaft! We'll remove the pistons first. Before we do that though, we're going to mark the pistons numerically with a metal stamp set:

Now there are two places you will mark each piston assembly: at the base of the connecting rod, and on the rod cap. You will see a horizontal line connecting the two. You will stamp one number above that line, and one number below that line. That way you will have one number stamped on the base of the connecting rod, and one number stamped on the rod cap. I didn't get a chance to take a pic of this on my LS1, but I did manage to create an example, shown below, from one of my hot rod magazines:
 Now even though the above pic is from a different engine, what you'll be looking at on the LS1 will be very similar. Also note in the above pic that they have the number 4 stamped on both the rod cap and the connecting rod.
Now how do you know which piston gets what number? Refer to the GM Service Manual of your engine year (in my case, 1998), or a Haynes manual, and you will see the firing order, which will tell you what cylinder number goes to what cylinder, and that's how you know which number to stamp on what piston rod and cap.
Now to stamp it, just press the numbered end of the stamp against the metal, and strike the end of it with a hammer. I sucked at this. You have to hit it pretty damn hard to make a dent. It's tricky when you don't want to smash your fingers:

 Now you need to grab your 9mm socket (along with some muscle) to unbolt the bolts that hold the rod cap(s) and connecting rod(s) together, circled in red in the pic below:
 Now you can remove the rod caps and get the pistons out. Be careful to not let the piston(s) slide out and fall onto the floor when you remove a rod cap. Get a friend to put his or her hands underneath the cylinder the piston could fall out of. The hands will serve as a good safety net while the piston scoots its way out of the cylinder.
To get the piston out after you've removed its rod cap and rod bolts from the connecting rod, you get a dowel rod or a breaker bar and set the flat end of the dowel rod/breaker bar on the outer edge of the piston slug. You'll see what I mean when you put the dowel rod/breaker bar down the cylinder and look down the cylinder at the bottom of the piston. You don't want the dowel rod/breaker bar to push the against the body center of the piston. It's better to push against the outer edge of the piston that's got some thickness to it. Here's a picture of my buddy Carl getting a piston out on the LS1:
 Notice in the pic above that Carl is pushing with his breaker bar tool, and cupping his other hand underneath the cylinder to catch the piston in case it falls out quickly. I would have helped, but I was too busy taking a picture. ;)
The video below is a great example of how to remove the pistons from a v8 engine. It shows you EXACTLY where to place the dowel rod/breaker bar to push the piston out (in case my description is a little unclear), and is very easy to follow:
When you have all of the pistons out, you should have something that looks like this:

To remove the crankshaft, you first have to unbolt all the main caps. You will use a 15mm socket (use a 15mm deep socket if you have to) on the bolts indicated by green arrows in the pic below, and you will use a 13mm socket on the bolts indicated by white arrows:
 In addition to those, there will be main bolts going into the sides of the mains through the block. Be sure to remove those. Then you'll just pull off the main caps (except for the last one at the rear of the engine because you have remove the engine backing plate to get the last main out, which I will soon explain how to do). Make sure to keep them in order in a shallow cardboard box or something similar as you take them off. If they're hard to get off, tap them with a hammer on their sides to try and loosen them some, but be careful not to damage them. Then just pull them off with your hands:
 Now to remove the last main, you have to remove the backing plate at the rear of the engine. This is where small hands come in....well....handy, because the space in between the backing plate and the engine stand is minimal. Get one of those small hands a socket wrench with a 10mm socket and undo these bolts:
 Once all the bolts were out, the backing plate came off pretty easily. Now just bang on the sides of the last main if you have to loosen it some, and wiggle and work it upward with your hands, and it will come out eventually:
 Now all that's left to do is pull the crankshaft! Get a really good grip on it, it's a little heavy and slippery with oil. Once you've got a good grip, just pull it off:
 Removing the crank will REALLY make you feel like a gearhead.
Now just remove the main journals, and you're all done: Now the teardown is complete. Well, unless you have engine mounts on the side. If you do, then no big deal, you'll be able to unbolt those without any problems if you've gotten this far!
And just for kicks, I thought I'd include a video that very clearly shows you how the crankshaft, pistons, lifters, pushrods, rocker arms, valves, and camshaft all work together. It's a very clean animation and props to whoever made it. Enjoy:
Now that I had my engine all taken apart, it was time to take it to the engine shop, just to make sure all the clearances check out and to get it balanced. I've never been to an engine shop before so this was a great experience.
After doing some research on LS1 engine shops in Houston (thank you LS1tech.com!), I decided to go with LME (Late Model Engines). The have a great reputation so I felt comfortable with them.
It was cool seeing the parts I took there in actual engine shop. I took the crank, the mains, the main bearings, the heads with the valves and valvesprings, the block, and the pistons with their connecting rods, rod caps, and rod bearings:
 Right away the engine shop dude wanted to check how tight the piston fit inside the cylinder, so he kept switching between the piston and the block, using one tool (a micrometer) to measure the piston, and another tool (don't know what this one is) to measure the cylinder width:

 After awhile of going back and forth between the piston and the cylinder, he told me I was gonna have to get new pistons because the pistons don't fit tight enough in the cylinders. THIS IS EXACTLY WHY YOU TEAR DOWN A MOTOR WHEN YOU BUY ONE!! It's a good thing we didn't install this motor right after we bought it; the engine would have run like crap.
So the LS1 is now at the shop, and they're working on the block, crank, and other parts to make it all work beautifully when we put it back together, install it, and fire it up. I should get it back several weeks from now. :)
Hey guys, just wanted to let you know that I took quite a bit of photos at the Houston Autorama show and made a little gallery for it. You'll need the Flash 8 player to view it, and you can get it here if you can't view the gallery.
The gallery is here: http://www.demonpixel.com/AUTOMOTIVE/Autorama2005/
My favorite part of the show was that Spirit Industries built a car one foot away from me! Check out images 37-92 to see how they did it.
I know some of the images aren't the best quality. That's because I had the wrong batteries in the camera half the time I was at the show. Sorry about that! D'oh!
This is my first post. I started this blog because growing up I never really had any friends that were gearheads but always wanted to learn cars, and so if there's anyone out there like me who wanted to get into it but never could, this blog is for you. I'm a beginner still, so these posts will also be about what I go through when I do little automotive projects for my 1972 Formula Firebird.
I got this car because those kinds of cars are mostly mechanical with very simple electrical wiring....usually. I felt that since they were mechanical, as opposed to all the computerized cars these days, I would learn a lot more about the different systems of a car and just cars in general.
So with that said, I'd like to share my experience with the carburetor.
The carburetor is a mechanical device that basically delivers fuel to your engine. It sits on top the the intake manifold, which sits on top of the engine. Somewhere on the carburetor is this thing called a choke. As far as I can tell, the only thing that a choke does is help start the car. It's called a choke because it restricts airflow from one part of the carburetor so that the intake manifold vacuum can pull a richer mixture of fuel into the engine.
When I bought the Firebird, it started and ran fine for a while, but then one day, for some reason, it wouldn't start up right away. It took a long time before it started and I had to keep pressing the gas to keep the car on. As soon as I took my foot off of the accelerator, the car shut off. I took my car to a shop to adjust the choke or idle screws (the idle screws control how much air/fuel mixture you want the car to have at idle but they also aid in startup), and they dropped my carburetor. I towed it to another shop because I couldn't stand those shady ass mechanics, and they told me there was a crack on the inside of the carburetor. It was an Edelbrock Quadrajet carburetor.
So I had to get a new carburetor. I thought long and hard about it, between Edelbrock, Holley, Rochester, and Barry Grant's Demon carburetors. I researched on the web and went to Borders and read their carburetion books to help me make my decision. Since I'm new at this and I wanted something that would teach me the quickest and easiest way, I got the Demon carb. It was way more expensive than the other ones, but it seemed clearer to me, so I got it. The Edelbrock and the Holley looked more complicated that what I wanted to mess with, and the Rochester is 20 to 30 year old technology (they stopped making them in the 80s), and the Demon was much, much newer, and when you buy a new Demon carburetor, Barry Grant also sends you a video that shows you how to install it, how to start it, how to adjust the choke, the throttle valves, and the idle screws. Learning by video sounded excellent to me, so that was all the more reason to go with the Demon.
However, my friend Kelcey had a 68 Mustang a few years back and he told me that he ordered an Edelbrock carburetor online, and when he got it in the mail, he opened it up, he took off the old carb from his car, bolted on this new one, and connected two lines - the vacuum hose and the fuel line - and started up the car and drove away.
So I probably would have gone with the Edelbrock if I didn't take it to a shop and if I hadn't already ordered the Demon.
Since I knew nothing about installing carburetors, I wanted a shop to do it. I paid an insane amount of money, although to be fair, half of that was the carburetor itself, which was around $500. I could have done it myself though, I am SURE of that.
Basically, you just do what Kelcey did. You unbolt the old carburetor from the intake manifold...there should be four bolts holding it down...then you remove the vacuum line(s) (some cars might have more than one vacuum line), remove the fuel line, and remove the gasket that was sandwiched between the carb and the intake. Remove the accelerator link also. Then, clean off the little area where you removed the old gasket with a light sandpaper. On my car, I needed an adapter plate for my intake so the Demon carb could go on there, so you put that on the intake manifold, and then put the new gasket over that one. then you bolt on the Demon carb, but don't bolt it on as hard as you can because if you do, you'll break the gasket. Get on there snug, but not like you're going to break something. Hook up the vacuum line(s), and the fuel line. Then hook up the accelerator arm to the throttle linkage. The Demon carburetor video shows you how to do all of this. Press on the accelerator arm a few times to prime the carburetor, which means to put a little gasoline into the float boals of the carburetor, so that it can start easier.
Put the air cleaner back on.
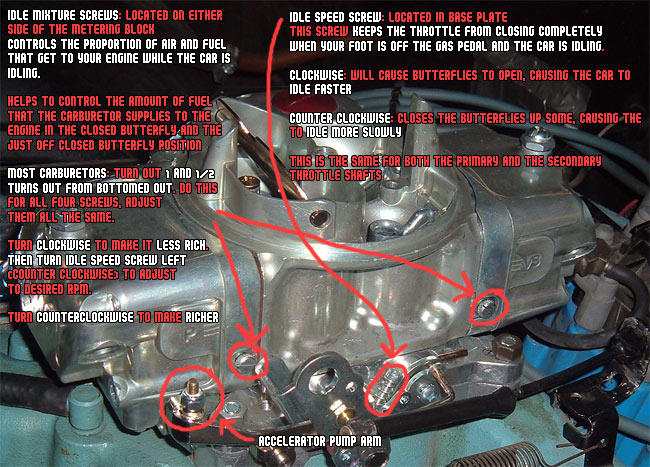
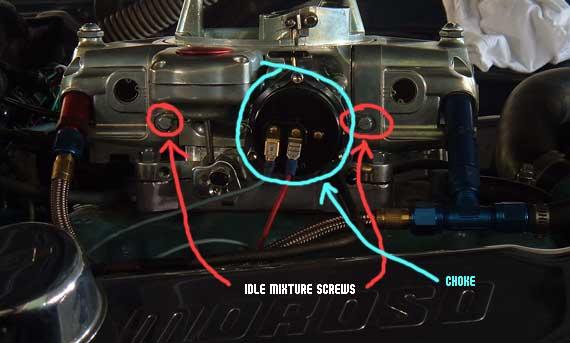
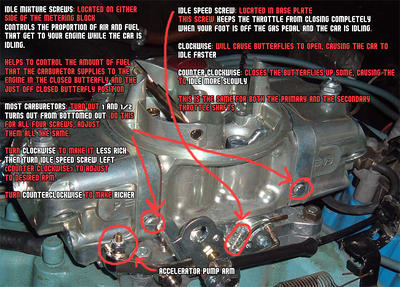
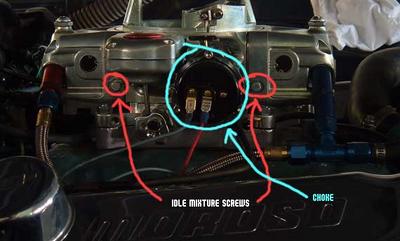
Crank the engine, and it should start. If not, crank it again, and maybe a third time, and it should fire right up. Let the car sit for a bit so that it can warm up. After it's warmed up some, drive it around the block to see what it's like; you'll probably have to do a little tuning to make it idle the way you want to via the idle speed and idle mixture screws. Here's where the idle speed and idle mixture screws are on my Demon carburetor (click on the pic to view a larger version of the image):
 Here's the other side:
Now for my car, with the spacer, the hood wouldn't shut. So what I had to do was get a different air cleaner. I got a Mr. Gasket drop base air cleaner. The hood cleared fine.
Next I'll talk about hooking up an aftermarket tachometer.
When I bought the Firebird, all the gauges seemed to be working except the tachometer. For some reason, the backlight on the tach came on when I turned the headlights on, but the needle never moved when I was driving around. It's a Super Sun II Tachometer, and I chose to try and get it to work as my very first project on the Firebird that I could do all by myself (meaning, without the help of a shop).
I have this book on auto electrical systems, a really easy to read book, perfect for newbie beginners like me who didn't know anything about how electrical circuits worked.....the title is "Automotive Electrical Handbook" by Jim Horner, and I got it at Borders for about $20. On page 44, it had a diagram of a typical tach hookup, along with a few paragraphs about it. It said there are basically three wires. One is red, one is black, and one is green. The red one can connect to some place that provides power in your fuse box, the black one goes to ground, and the green one goes to the signal. The signal in this case is a place on the ignition coil that's labeled NEG. or DIST. or TACH. Luckily, the backlight came on mine already when I turned the lights on, so I thought that it just wasn't getting signal. I found the green wire in the back of my tach, along with a black wire, a red wire, and a white wire (the white wire goes to lighting but I'm not sure yet). Those were hooked up, I just needed to find where the green wire went.
I followed the green wire coming out of the tach through the firewall. It was shoved into a body of wires and took me quite a while to find the end of it. I found the end of it finally, and sure enough, it wasn't hooked up to anything. I got this kind of wire connector:
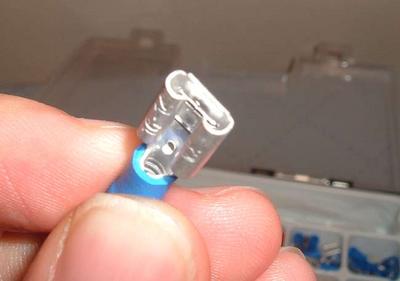
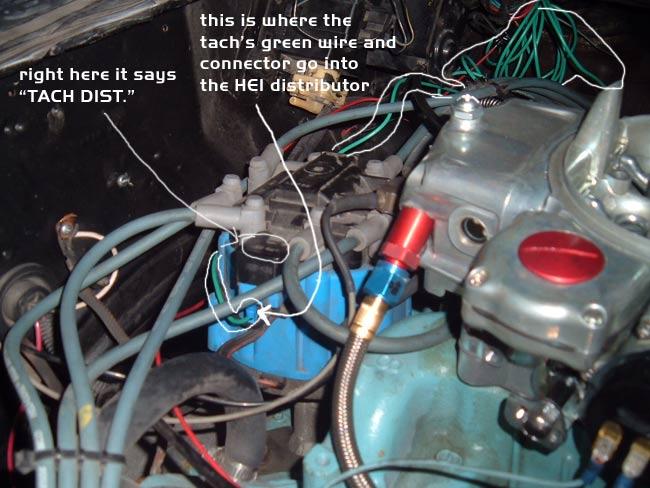
and crimped it down onto the wire, and connected it to my ignition coil. Now, the service manual I had for the car talked about a normal distributor, the stock one that came with those models. But mine had been upgraded to an HEI distributor so I was having a hell of a time finding my ignition coil. I asked a few guys from a chat room, and they told me the ignition coil was inside the distributor. There was a section in the Haynes book I have that confirmed this. So once I knew that, I just connected the wire with its connector to where it said TACH DIST. on my distributor.
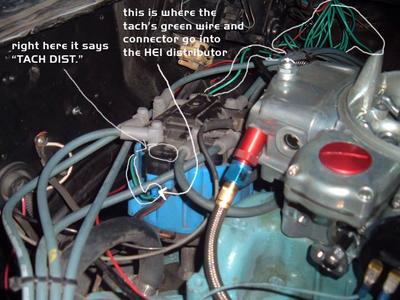 I started the car and drove it around for a while, and sure enough, the tachometer needle went up as I accelerated. Success!!
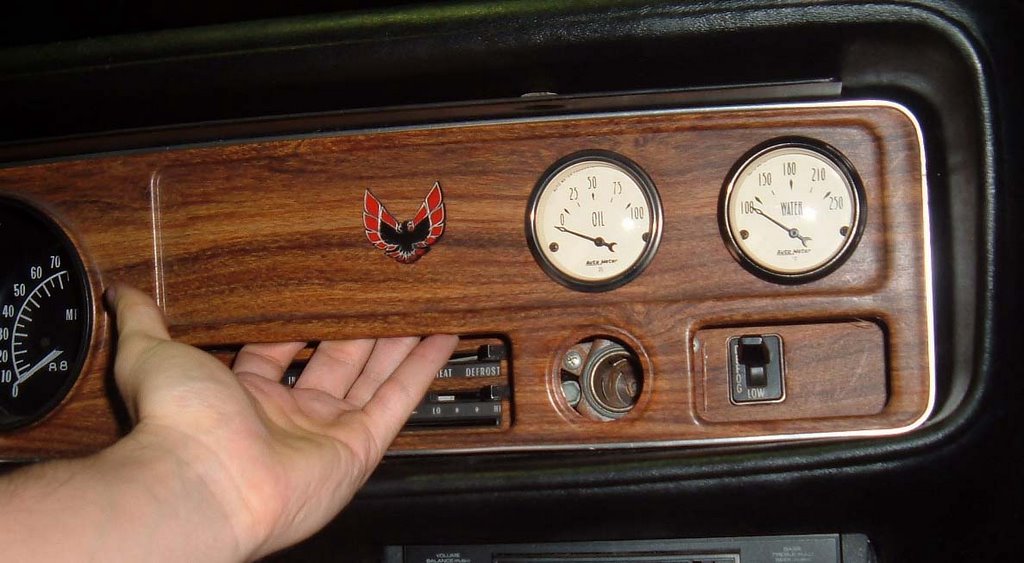
I have been wondering for quite a while how to remove the instrument panel. Mine's woodgrain, and even though I love woodgrain, with the metallic blue paintjob that I have and black leather seats, I thought a black instrument panel would look a little nicer. Here's an example of a 1972 Firebird with a black instrument panel:
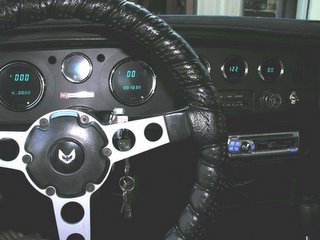 There were only a few steps involved for me to remove it. The Haynes that I have says to first remove the lower instrument panel. Well, when I got the car, that panel was already removed, so I was lucky (don't worry, the panel was in the trunk, so I can easily bolt it back on).
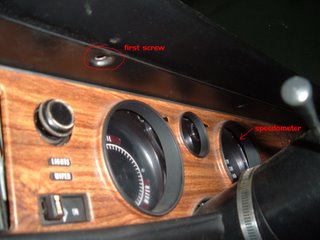
Next, locate the three screws at the top of the instrument panel, that are hanging upside down, and unscrew them. I used a Phillips head screwdriver for these screws:
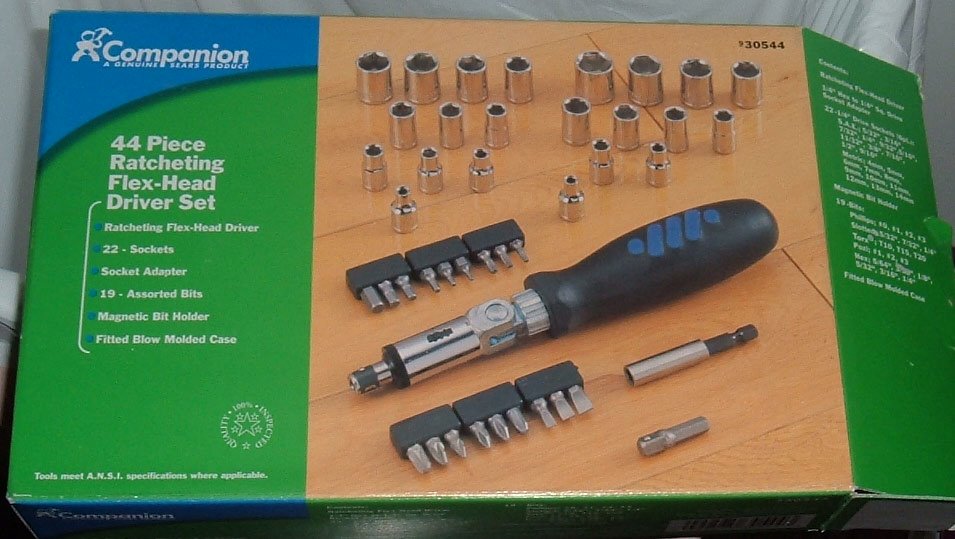
 Now would be a good time to mention a really helpful socket toolkit I bought. I got this one:
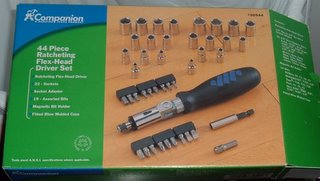
and even though it's probably for amateurs, it really helped me to remove the instrument panel quickly.
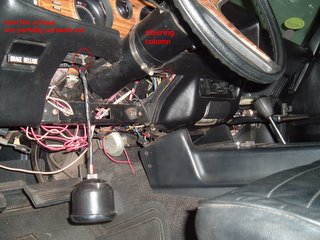
Ok, so after you remove those three screws at the top, look up underneath the steering column. You will see two screws to the left and right of the steering column, about 3 inches each from the steering column. I used a hexagonal socket on the socket wrench to unscrew these:
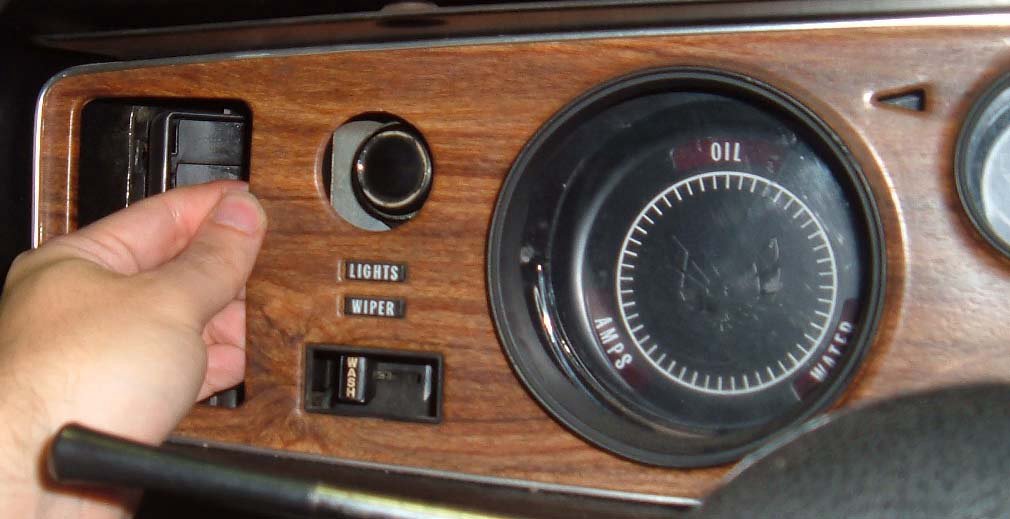
 The last thing I had to do was to remove the cigarette lighter parts. You can easily just pull out the cigarette lighter:
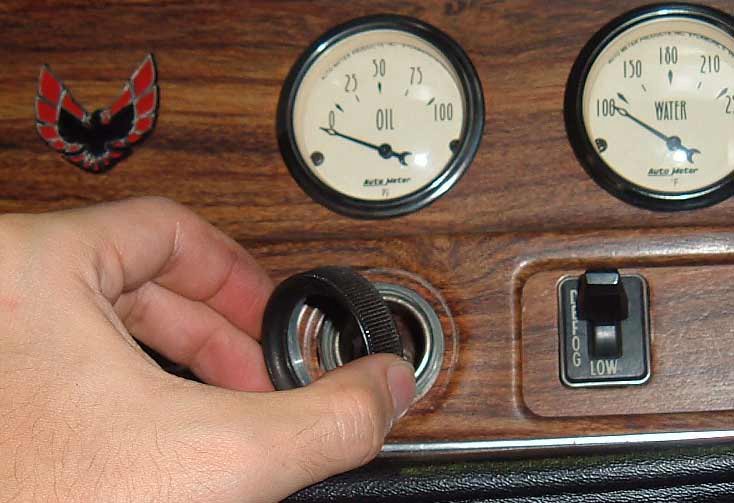
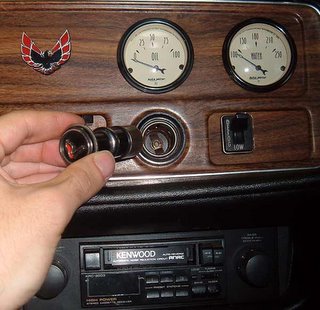 and you'll be left with the outer rim of the cigarette lighter. Just twist this hard to the left:
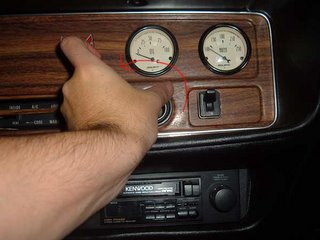 And it will screw off the instrument panel:
 Now all that's left to do is pull the panel off! Start with the left side, and put your fingers through the air vent. Then tug it toward you some:
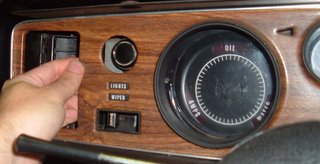 Then you can put your fingers inside the instrument panel on the left, above the air conditioning controls:
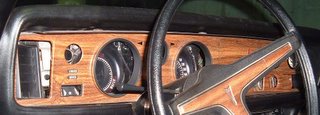
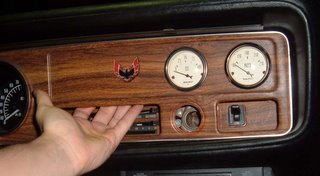 and tug that toward you also. And that was all I had to do to remove the instrument panel!
 That bolt is on there so tight that you will need an air compressor and an air ratchet gun to get it off. My buddy Crazy Cool Carl came over with his air compressor:
 I think this was a 3 and a half horsepower air compressor that he got at Harbor Freight. We plugged it into an extension cord, let it run til it was "warmed up." It was pretty loud warming up. When the loud noise stops, that's when you know it's done warming up. We then hooked up an air ratchet gun to it. The crankshaft pulley bolt is a 15/16 bolt, so we put a 15/16 socket on the end of the air ratchet gun. Carl put the gun/socket on the bolt and pulled the trigger, and it came off in a second. AWESOME.
 We went to Advance Auto because they have a "tool borrow policy" where you pay for the tool, but if you bring it back the next day, they refund you 100% of the money. Great for when you only need to use a specific tool occasionally.
 Now what we had to do is get the end of the pushrod to butt up against the bolt in the second pic above, take the three claws of the crow's foot and make them grab onto the three prongs of the harmonic balancer:
 Once they're grabbed on, attach a 3/4 inch socket and a socket wrench to the crow's foot:
 Turn it slowly but steadily. The crow's foot will start to pull the harmonic balancer off! You will know it's working when you start seeing this stripe of metal:
 Just keep turning and turning, and it will eventually come off:
 Next I will talk about removing the oil pan.